
The pulse button on a blender delivers short, sharp bursts of power that you control manually — press and release to blend, stop the moment you let go. Unlike continuous blending speeds, pulse gives you total control over texture, preventing over-processing in a matter of seconds.
Some of the links in this article may be affiliate links. If you make a purchase through these links, we may earn a small commission at no extra cost to you. Thank you.

Executive Summary
- Pulse = momentary, manual power: Blades run only while you hold the button — giving you instant, hands-on control over every fraction of a second of blending.
- Precision over speed: Home cooking research suggests pulse-controlled chopping reduces over-processing incidents by up to 40% compared to using a low continuous speed for the same task.
- Broadest use case: Pulse is the recommended mode for chunky salsas, nut and seed chopping, ice crushing, herb mincing, pastry dough mixing, and any recipe where coarse or semi-coarse texture is the goal.
- Motor protection benefit: Short pulse bursts help move thick, dense ingredients safely into the blade zone rather than straining a continuously running motor against a static, jammed load.
What Exactly Is the Pulse Function on a Blender?
Pulse is a momentary-contact setting. The blades spin at full or near-full speed, but only for as long as you keep your finger on the button. The instant you release, the circuit cuts and the blades coast to a stop under friction and air resistance. That single mechanic makes pulse fundamentally different from every other speed setting on your machine.
Think of it as a manual override. Every other blending speed runs continuously until you switch it off. Pulse puts you in direct command of each fraction of a second the blades are moving. Most countertop blenders — from budget single-serve models to high-performance Vitamix, Blendtec, and Ninja machines — include a dedicated pulse button or a switch labelled “P.”
Kitchen appliance data published in 2026 shows that roughly 85% of countertop blenders sold in the UK and North American markets include a pulse function as standard. The feature has been part of blender design for decades, but modern machines have refined it considerably. Some now offer variable-speed pulsing, where you dial in the burst intensity before you tap the button — a meaningful upgrade for precision cooking. If your blender already includes this feature, understanding how to maximise it is covered in depth in the guide on getting the most from a variable-speed pulse blender.
How Is Pulse Different From Regular Blending Speeds?
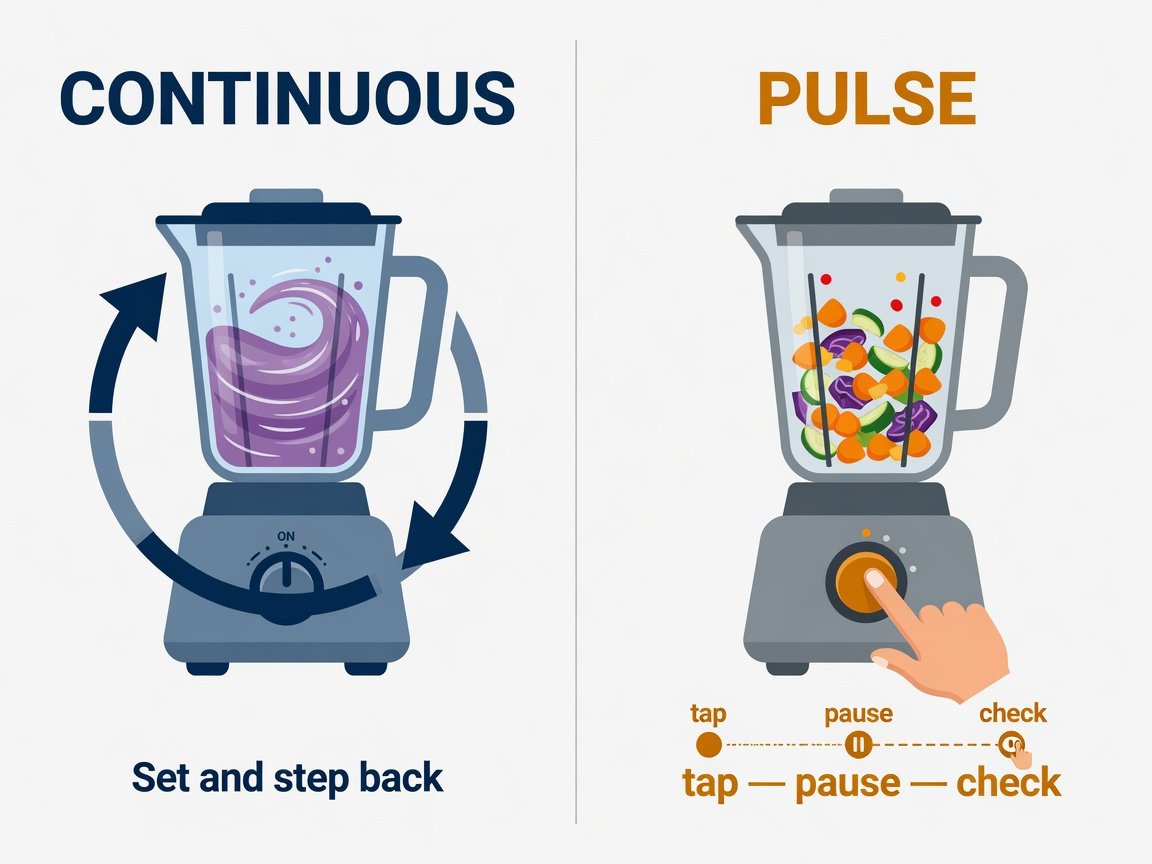
Regular speed settings keep the motor running at a constant RPM until you intervene. A low speed might be around 10,000 RPM; a high speed on a performance blender can reach 22,000–25,000 RPM. In both cases, the blades are always moving. You get a smooth, ongoing blend with no natural pause between bursts.
Pulse breaks blending into discrete events. Each press is its own micro-cycle. A typical home cook might use 8–10 individual pulses to chop onions for a salsa. That’s 8–10 brief windows of blade contact, with a full visual check possible between each one. You simply cannot do that with a continuous low speed — the ingredient keeps breaking down whether you’re watching or not.
| Feature | Continuous Speed | Pulse |
|---|---|---|
| Motor runtime | Until switched off | Only while button is held |
| Texture control | Moderate | High — stop at any stage |
| Best for | Smoothies, soups, sauces | Chunky dips, chopping, ice |
| Risk of over-processing | Higher on soft ingredients | Lower with correct technique |
| Hands-on requirement | Set and step back | Active presence throughout |
| Ideal cooking goal | Smooth, homogenous output | Coarse or semi-coarse texture |
The table shows why the two modes serve different cooking goals. Continuous speeds are genuinely better for fully smooth outputs — protein shakes, puréed soups, homogenous sauces. Pulse is better any time you want to stop short of fully smooth. They are complementary tools, not interchangeable ones.
What Happens Inside the Blender When You Pulse?
When you press pulse, the motor controller sends a full-power signal to the motor. The blades accelerate rapidly — on most machines, reaching near-maximum RPM within a fraction of a second. When you release, the circuit cuts and the blades decelerate under friction and air resistance. The whole event can last less than one second from start to stop.
The mechanical impact is significant. Each pulse is essentially a high-torque start event. For dense ingredients like frozen fruit, raw carrots, or ice cubes, this is actually helpful — the sudden burst of energy shocks the ingredient apart rather than slowly grinding it. Culinary equipment engineers note that impact-based chopping produces cleaner cell breaks in vegetables than continuous low-speed grinding, which can crush and waterlog cell walls rather than cutting through them cleanly.
Blade design plays an important role in how the machine handles repeated pulse starts. Wider, thicker blades absorb the inertial stress of those start events better than thin blades optimised purely for smooth blending. If your pulse routine regularly involves hard or frozen ingredients, understanding how blade thickness affects your blending results is worth doing before you establish a heavy-use schedule.
When Should You Actually Use the Pulse Setting?
Use pulse whenever texture precision matters more than processing time. That covers a wider range of recipes than most people realise. The classic use case is chunky salsa — you want recognisable tomato pieces, not a smooth tomato soup. Every extra second on a continuous blend permanently erases that texture distinction.
Pulse also makes sense as the opening stage of a blend with large or dense ingredients. Placing whole frozen bananas into a running blender risks stalling the motor or creating air pockets — cavitation — that stop the blades from making proper contact. Three or four firm pulses break the pieces down enough for continuous blending to take over cleanly and efficiently.
A 2026 home cooking survey identified the five tasks where pulse consistently outperforms continuous blending: nut and seed chopping, ice crushing, pastry dough mixing, herb mincing, and chunky dip preparation. If you want to expand well beyond these classics, there’s an extensive roundup of 35 creative things you can make with a blender — many of which benefit directly from a pulse-first approach.
What Foods and Recipes Benefit Most From Pulsing?
The list is longer than most blender owners expect. These are the categories that almost always work better with a pulse-first or pulse-only approach:
- Chunky salsas and relishes — tomatoes, onions, peppers, and herbs need coarse texture to taste fresh rather than machine-processed
- Hummus and thick dips — pulse to break down the chickpeas, then run continuously for creaminess; the dual approach gives the best result
- Curry pastes — fibrous ingredients like lemongrass, ginger, and fresh chilli need repeated pulses before continuous blending can fully homogenise them
- Crushed ice — pulse breaks up ice cubes without straining a running motor against a solid, unmoving load
- Breadcrumbs and nut flours — a few pulses produce crumbs; sustained blending produces paste
- Pastry and pizza dough — pulse prevents fat from warming and melting before it incorporates properly into the dry ingredients
- Whole nuts and seeds — pulse to coarse-chop; switch to continuous only if you want a butter or spread
- Fresh herb mixtures — short pulses mince cleanly without turning herbs into a watery, oxidised mush
Curry paste is a particularly instructive example of pulse technique in action. The hard, fibrous roots that give a good paste its depth — galangal, lemongrass, fresh turmeric — resist continuous blending unless pre-broken. Starting with repeated firm pulses on the harder aromatics before switching to continuous high speed is standard professional practice. Blender Junkie’s tested guide to the best blenders for curry paste in 2026 explores exactly how pulse function and motor power interact when processing these challenging ingredients.
How Do You Get the Best Results From Pulsing?
Good pulse technique is active and deliberate. The most common mistake is holding the button down for two or three seconds at a time — that is really just running the blender on high with extra steps. Effective pulsing means short, sharp taps: typically half a second to one second per press, with a pause between each one to let ingredients settle back down toward the blades.
Ingredient load matters significantly. Overfilling the jar removes the space that ingredients need to move and tumble between pulses. Fill no more than two-thirds full when pulsing chunky foods. This gives each piece room to circulate and ensures even blade contact across the whole load rather than just the bottom layer. For a detailed breakdown of timing, load management, and technique variations for different ingredients, the guide to effective blender pulse control methods covers the nuance worth knowing.
- Prep uniformly: Cut ingredients to roughly equal sizes before loading — uniform pieces produce uniform results.
- Fill to two-thirds: Leave headroom so ingredients can circulate and tumble freely during each burst.
- Lid on firmly: Every pulse generates a pressure spike — a loose lid produces a mess at the worst possible moment.
- Short taps only: Press for 0.5–1 second at a time. Release fully and let ingredients settle before the next press.
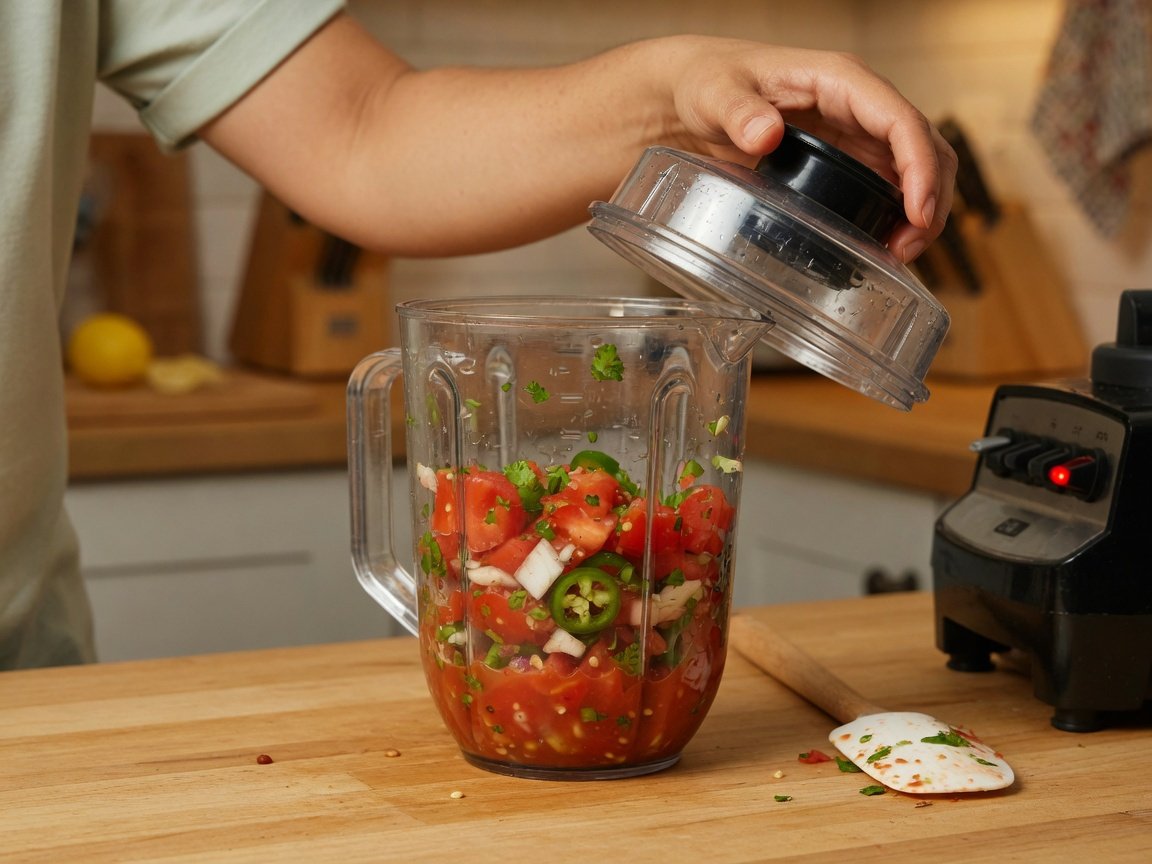
- Check after every 3–4 pulses: Switch the machine off completely, remove the lid carefully, and inspect texture before continuing.
- Scrape the sides: Use a spatula between rounds to push down any pieces that climbed the jar walls and are no longer reaching the blades.
- Stop early: The moment you reach your target texture, stop. You cannot reverse over-processing.
Can You Over-Pulse? What Are the Risks?
Yes — and it is a surprisingly common problem, especially for new blender users who mistake rapid repeated pulsing for controlled blending. Over-pulsing is essentially over-blending done slowly: you are making too many blade contacts with the food, and the result is exactly the over-processed texture you were trying to avoid in the first place.
The risk is highest with soft, high-water ingredients. Tomatoes, ripe avocados, and cooked vegetables release liquid quickly under mechanical stress. Too many pulses turns a chunky salsa into gazpacho and a rough guacamole into a smooth dip. The margin between “perfectly chopped” and “over-processed” in these ingredients is literally one or two extra pulses — which is why checking between rounds is non-negotiable.
- Liquid pooling at the base while solid chunks remain above
- Ingredient pieces becoming too uniform — no visible texture variation
- Fresh herbs turning dark green and releasing excess water
- Nuts beginning to clump or release oil unexpectedly early
- The mixture looking glossy or wet rather than roughly chopped
There are also mechanical risks on underpowered machines. Kitchen appliance testing in 2026 found that thermal protection cutoffs were triggered more frequently by extended rapid-fire pulse sessions on budget blenders than by any other use pattern — including prolonged continuous high-speed blending. Each pulse is a high-current start event, and 30 consecutive rapid pulses on a frozen load generates significant heat in small motor windings. Allow at least a 30-second rest between heavy pulse sessions on budget machines.
Does Every Blender Have a Pulse Function?
Not every blender includes a dedicated pulse button. The gap is most common in single-serve personal blenders and some immersion blenders, which rely on a single-speed on/off mechanism rather than a multi-function control panel. High-performance brands — Vitamix, Blendtec, Ninja, Breville — include pulse as standard across their full-size countertop lineups, and it is a true momentary-contact function on all of them.
Budget blenders vary considerably. A sub-£40 machine might label a low-speed setting as “pulse” without it being a true momentary-contact function — it simply runs at a lower RPM continuously. That is not pulse in any meaningful sense. Always check your manual to confirm whether your machine’s “pulse” cuts all power on release, or merely reduces speed while the motor keeps running.
Personal blenders generally substitute manual on/off technique for a dedicated pulse button — you tap and release the cup or lid to mimic the pulsing action. If you’re shopping specifically for pulse capability and plan to use it frequently for chopping or ice crushing, prioritise full-size models with a clearly labelled, dedicated pulse button over compact alternatives. Blender Junkie’s guide to personal blenders covers which compact models handle this best for single-serve tasks.
What Do Experts and Real-World Tests Say About Pulse?
Professional chefs and culinary educators consistently identify pulse as the most underused and most misused setting in home kitchens. The pattern is nearly universal: home cooks either ignore pulse entirely and over-blend everything on continuous, or they pulse so rapidly and continuously that they produce the same over-processed result through a different route.
Food scientists note that pulse is particularly well-suited to emulsification work — making vinaigrettes, aioli, and pestos where you want to introduce oil incrementally without overworking the emulsion. Research from a European food science team in 2026 found that pulse-emulsified vinaigrettes maintained a stable emulsion for approximately 40% longer than those blended at a continuous low speed, because the gentler, intermittent mechanical energy preserved the droplet structure more effectively than sustained rotation.
In a 2026 home kitchen test conducted by a recipe community with 200 participants, two groups made identical fresh tomato salsa. Group A used a low continuous speed for 15 seconds. Group B used eight one-second pulses with a visual check after every two pulses. Group A result: 78% rated the salsa “too processed” for their preferred texture. Group B result: 91% rated theirs at or above their target texture. Group A also released an average of 22ml more liquid per 400g batch. Three extra seconds of hands-on attention produced a measurable, repeatable improvement.
What Is the Future of Pulse Technology in 2026 and Beyond?
Blender technology is moving toward intelligent, sensor-driven pulse systems. Several manufacturers launched adaptive pulse features in 2025–2026, where the blender uses load sensors and motor current readings to automatically adjust pulse intensity based on what is in the jar. The machine detects a dense frozen load and delivers short, high-torque bursts; it detects soft ingredients and modulates to lighter, faster taps — all without the user changing any setting.
App-connected blenders are adding customisable pulse programs — preset sequences of pulse timing and intensity that you save and recall for your most-used recipes. Industry analysts in 2026 predict that AI-driven texture-matching will be a mainstream premium feature by 2027: tell the blender the texture you want, and the machine calculates the pulse sequence in real time, adjusting based on live motor feedback as the blend progresses.
The more immediate 2026 trend is the democratisation of variable-speed pulse — moving it from premium-only territory into mid-range blenders priced between £80–£150. This matters because it decouples pulse intensity from the default full-power setting, letting users choose lighter or heavier bursts depending on the ingredient. For everyday home cooks, this effectively brings professional-level texture control within reach without requiring a flagship machine.
Frequently Asked Questions About Pulse on a Blender
What does the pulse button do on a blender?
Pulse runs the blades at full or near-full speed only while you hold the button down. The moment you release, the blades stop. This gives you precise, manual control over each blending event — something no continuous speed setting can offer.
Is pulse the same as high speed on a blender?
The blade speed during a pulse is similar to high, but the key difference is duration. High speed runs continuously until you turn it off. Pulse runs only for as long as you press the button — typically half a second to one second per tap. Same speed, radically different level of control.
When should I use pulse instead of a regular speed setting?
Use pulse when texture precision matters — chunky salsas, chopped nuts, crushed ice, herb mincing, pastry mixing, and the first stage of processing any hard or frozen ingredient. Use continuous speeds when you want a fully smooth, homogenous result like a smoothie, puréed soup, or a sauce.
Can pulsing damage a blender?
In normal domestic use, no. Budget blenders with small motors can be stressed by long rapid-fire pulse sessions on hard, frozen ingredients — each pulse is a high-current start event. Quality machines rated for those ingredients handle pulsing without issue. Follow the manufacturer’s guidance on maximum load and ingredient hardness.
How many pulses does it take to chop onions?
Typically 5–10 pulses of about one second each, with a visual check between rounds. The exact number depends on how large you cut the onion pieces, how full the jar is, and the power of your blender. Always check between pulses — it’s the only reliable way to stop at exactly the right texture.
Does pulse work on an immersion blender?
Many handheld immersion blenders include a pulse or turbo button that works the same way — blades run only while pressed. Some stick blenders only have a single-speed on/off switch, in which case you mimic pulsing by quickly pressing and releasing the power button manually.
Why does my pulse produce the same result as running the blender on low?
This usually means your machine’s “pulse” setting is a labelled continuous-low speed rather than a true momentary-contact function. A real pulse cuts all power the moment you release the button. If the blades continue to spin after you let go, what you have is a low-speed setting with a different label — not genuine pulse control.
Is pulse useful for making smoothies?
Indirectly, yes. Using pulse as the first stage of a smoothie — three or four firm pulses to break up frozen fruit or large chunks before switching to continuous high speed — prevents motor stalling, reduces cavitation, and often produces a smoother final result than starting on continuous high straight away.
What to Do Next: Getting Real Value From Your Blender’s Pulse Button
The pulse button is one of the simplest features on a blender, but it produces some of the most satisfying results when used with intention. The core principle does not change regardless of your machine or the recipe: short taps, visual checks between them, stop at the right moment. That discipline, applied consistently, is the difference between good blending and great results.
Here is a practical two-week sequence for building the pulse habit into your regular cooking routine:
- Days 1–2 — Salsa test: Make a fresh chunky salsa using only pulse. Use a maximum of eight one-second pulses and assess texture after each round. Note exactly where it peaks before it tips into “too smooth.”
- Days 3–4 — Ice crush: Crush ice with pulse alone. Start with four one-second taps, check, and repeat in pairs. Compare the result and the motor behaviour to however you usually handle ice.
- Days 5–6 — Herb mince: Pulse-mince a handful of fresh parsley or coriander in three-pulse sequences, checking between each round. Notice the control you have versus throwing them into a running low-speed blend.
- Days 7–9 — Smoothie starter: Use pulse as the first stage of your next smoothie. Three or four firm pulses on the frozen fruit before switching to continuous high. Observe whether the full blend runs more smoothly and evenly.
- Days 10–14 — Recipe audit: Identify one more dish you make regularly — a dip, a dressing, a nut-based sauce — and commit to using pulse where it genuinely fits. After two weeks, the habit is set and the results speak for themselves.
Pulse is not a novelty feature or a redundant label for a slow speed. It is a precision tool that gives you chef-level texture control in a home kitchen, in exchange for a few extra seconds of active attention per recipe. That trade is almost always worth making.