
Your blender can make far more than smoothies. From silky soups and frozen cocktails to homemade nut butter, pancake batter, and even DIY face masks, there are dozens of genuinely fun things to blend — and most of them are faster and easier than you’d expect. Here are 35 creative ideas, organized by category, so you can get a lot more out of the machine already sitting on your counter.
Some of the links in this article may be affiliate links. If you make a purchase through these links, we may earn a small commission at no extra cost to you. Thank you.

- Most blender owners use their machine for fewer than three recipes — this guide covers the other 32.
- Many blender recipes take under five minutes, start to finish, with almost no washing up.
- A blender can replace several kitchen appliances — a food processor, a juicer, and sometimes even a stovetop pot.
- The right technique matters as much as the right recipe — a few simple habits unlock results most people never manage to get.
Can You Really Use Your Blender for More Than Smoothies?
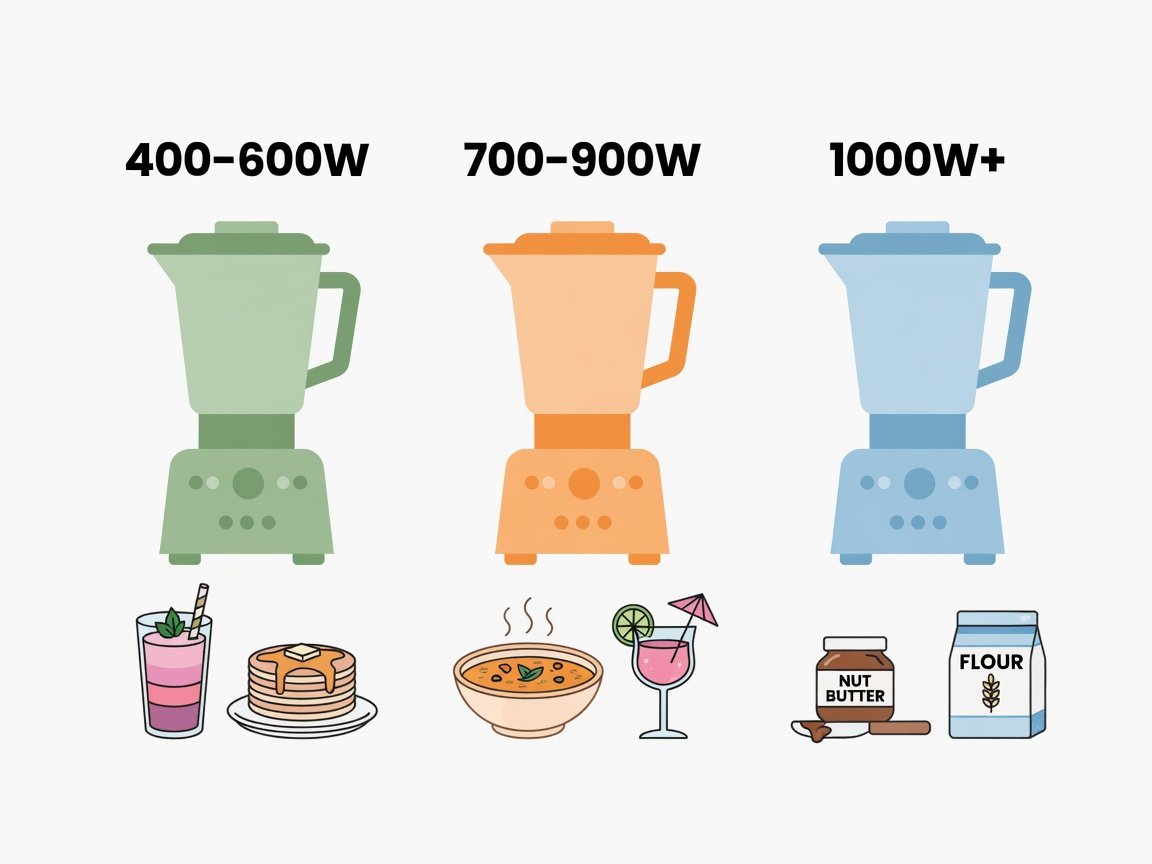
Absolutely — and by a wide margin. A standard kitchen blender runs anywhere between 500 and 1,500 watts, which is more than enough motor power to crush ice, emulsify fats, pulverise grains, and liquefy dense vegetables. Kitchen appliance research consistently shows that the average blender owner uses their machine for just two or three things. That’s a significant amount of untapped potential sitting on your counter every single day.
The key insight is that blending is just controlled destruction. Anything that benefits from being broken down, emulsified, or aerated is fair game. Culinary professionals have known this for decades — blenders are fixtures in professional kitchens specifically because they’re fast, consistent, and incredibly versatile. Once you start thinking of your blender as a general-purpose kitchen workhorse rather than a dedicated smoothie machine, the possibilities genuinely expand.
What Drinks Can You Make With a Blender?
Drinks are where most people start, and for good reason — blenders excel at liquid-forward recipes. But the category stretches well beyond the morning green smoothie once you start exploring.
- Classic fruit smoothies — the obvious starting point, and still one of the best uses of the machine.
- Green smoothies — spinach, kale, or cucumber blended with banana and apple. The fruit masks bitterness completely.
- Frozen margaritas — ice, lime juice, tequila, and triple sec. Blended cocktails are a genuine crowd-pleaser.
- Piña coladas — frozen pineapple, coconut cream, and rum. Comes together in about 45 seconds.
- Thick milkshakes — ice cream, cold milk, and your flavouring of choice. Results in seconds.
- Homemade frappuccino — cold brew coffee, milk, ice, and a little vanilla syrup. Costs a fraction of the coffee-shop version.
- Watermelon lemonade — blend the watermelon, strain briefly, then mix with lemon juice and a touch of honey.
- Nut milk — soak almonds or cashews overnight, blend with fresh water, and strain. Far cheaper and fresher than anything shop-bought.
- Frothy hot chocolate — blend warm milk with cocoa powder, dark chocolate, and a little sugar for a genuinely velvety result.
If smoothies are your main goal, there’s more technique involved than most people realise. Getting the liquid-to-solid ratio right, layering ingredients correctly, and timing the blend makes a real difference to the final texture. These kitchen blender tips for making smoothies like a pro cover those details in depth if you want to level up your morning routine.
What Hot Soups Can You Make in a Blender?
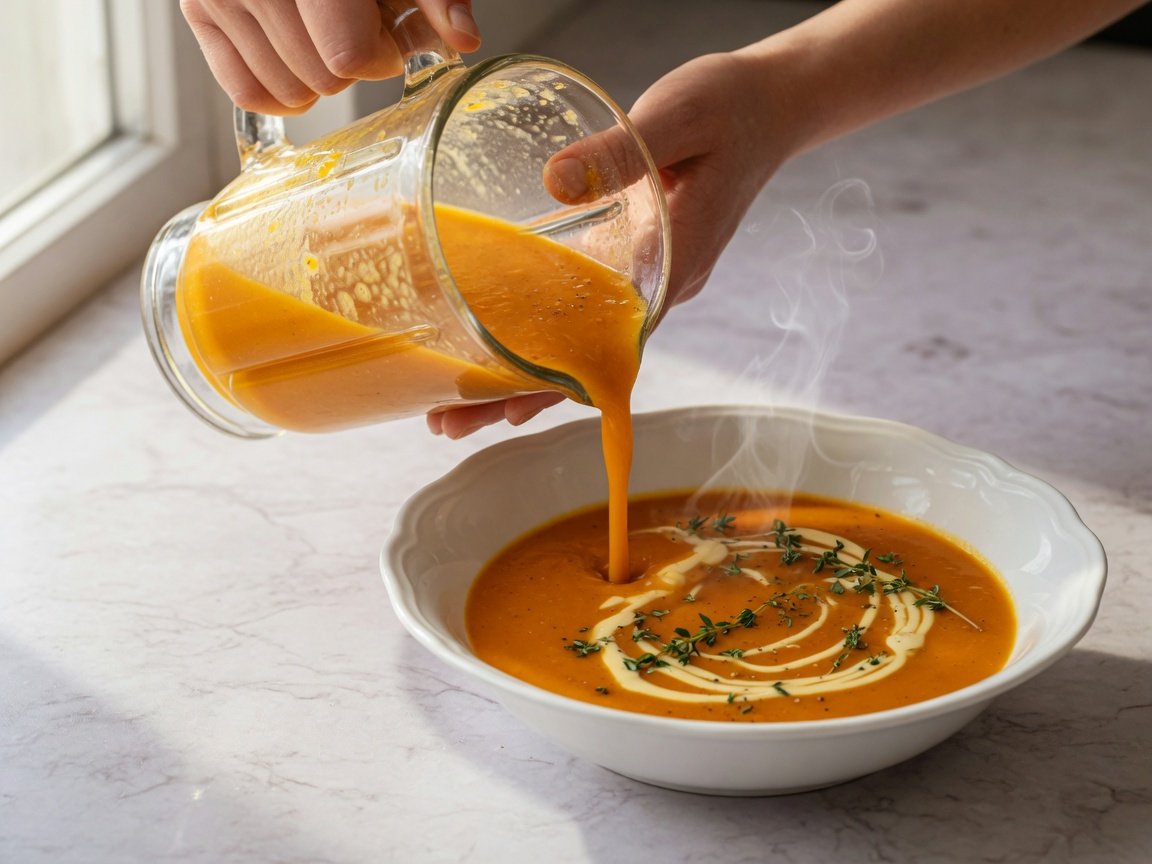
Blended soups are one of the most satisfying results a blender can produce, and they’re significantly easier than they look. The basic formula is this: roast or steam your vegetables, add stock, blend until smooth, then season. That’s genuinely it — and the texture you get from a blender is silkier than almost anything a handheld mixer can achieve.
- Tomato soup — canned tomatoes, roasted garlic, onion, and vegetable stock. Ready in about 20 minutes.
- Butternut squash soup — roast the squash first for sweetness, then blend with fresh ginger and coconut milk.
- Pea and mint soup — frozen peas, mint, onion, and stock. Blend straight from frozen to preserve a vibrant green colour.
- Gazpacho — the classic cold Spanish soup. Blend raw tomatoes, cucumber, peppers, garlic, olive oil, and sherry vinegar. No cooking needed.
- Carrot and coriander — a weeknight staple that comes together in under 30 minutes and reheats perfectly.
- Cauliflower and cheese soup — silkier and creamier than any stovetop-stirred version, with a proper restaurant texture.
A quick safety note on hot liquids: let your soup cool for at least five minutes before blending, never fill the jar more than halfway, and hold the lid firmly with a folded cloth. Steam pressure builds fast in a sealed jar. If you plan to make hot soups regularly, it’s worth understanding whether a purpose-built machine makes sense — the question of whether a hot and cold blender can genuinely replace your stovetop is one Blender Junkie has explored in detail.
What Sauces, Dips, and Pastes Can You Blend?
Blenders make sauces smoother, dips creamier, and pastes more consistent than almost any other method. This is often where a mid-range blender earns its place in the kitchen on a daily basis, not just at breakfast.
- Hummus — chickpeas, tahini, lemon, garlic, and olive oil. Better than anything from a shop, ready in three minutes.
- Guacamole — pulse rather than blend for a chunkier result, or blend smooth for a restaurant-style dip consistency.
- Pesto — basil, pine nuts, parmesan, garlic, and olive oil. Blend in short pulses to control texture.
- Hollandaise sauce — notoriously tricky on the stove, but almost foolproof in a blender when you drizzle the butter in slowly.
- Blended salsa — pulse canned or fresh tomatoes with onion, jalapeño, lime juice, and coriander for a fresh, punchy result.
- Thai or Indian curry paste — fresh lemongrass, chillies, galangal, garlic, and aromatics blended into a deeply flavoured base.
- Romesco sauce — roasted red peppers, almonds, tomatoes, and smoked paprika. Pairs with almost anything grilled.
- Vinaigrette salad dressings — any combination of oil, acid, and emulsifiers comes together in 15 seconds and stays emulsified for days.
Curry pastes in particular reward using the right machine. Wet, fibrous aromatics like lemongrass and galangal need serious blade torque to break down properly — lower-powered blenders tend to spin around the solids rather than through them. If making South or Southeast Asian pastes at home is on your list, the tested top picks for blending curry paste will save you a lot of frustration.
What Breakfast Foods Can You Make in a Blender?
Blenders make breakfast faster without making it boring. Several classic breakfast recipes are dramatically easier when you skip the whisk and use a blender jar instead — particularly because the jar doubles as a pouring vessel, cutting the washing up to almost nothing.
- Pancake batter — add all wet and dry ingredients to the blender, blend for 20 seconds, and pour straight from the jar. No lumps, one vessel to clean.
- Crêpe batter — same principle as pancakes, just thinner. Rest the batter in the fridge for 30 minutes before cooking for best results.
- Oat flour — blend rolled oats for 30 seconds. You now have a whole-grain flour for baking, at a fraction of the cost of buying it pre-milled.
- Drinkable overnight oats — blend soaked oats with fruit and yogurt for a smooth, creamy breakfast you can take anywhere.
- Baked egg cups — blend eggs, milk, diced vegetables, and cheese together, then pour into a muffin tin and bake. Meal-prep friendly.
- Blender banana bread batter — overripe bananas, eggs, oats, a little baking powder, and optional cinnamon. Blend and bake directly in a loaf tin.
Culinary efficiency specialists call the single-vessel pancake method “pour-from-blend” cooking, and it’s become increasingly common in minimalist kitchen setups precisely because it eliminates both the prep bowl and the intermediate transfer step. If you’re trying to reduce counter clutter and washing up simultaneously, this approach is a legitimate win.
| Recipe | Blend Time | Minimum Power | Difficulty |
|---|---|---|---|
| Fruit smoothie | 30–60 seconds | 500W | Easy |
| Pancake batter | 20 seconds | 400W | Easy |
| Blended soup | 1–2 minutes | 600W | Easy |
| Hummus or dip | 2–3 minutes | 600W | Easy |
| Frozen cocktail | 45 seconds | 700W | Easy |
| Curry paste | 3–5 minutes | 900W | Medium |
| Nut butter | 5–8 minutes | 1000W+ | Medium |
| Oat flour | 30 seconds | 500W | Easy |
| Nice cream | 2–3 minutes | 800W | Medium |
| Infused oil | 1 minute + strain | 600W | Easy |
What Desserts Can You Make in a Blender?
Blender desserts tend to be the category that surprises people the most. Most people know about smoothie bowls — but the machine can produce genuinely impressive results across the entire dessert category, including several that taste far more indulgent than the ingredients suggest.
- Nice cream — blend frozen bananas until they reach a soft-serve consistency. No dairy, no added sugar, genuinely creamy texture.
- Mango sorbet — frozen mango chunks blended with a squeeze of lime. Ready in two minutes, four ingredients or fewer.
- Chocolate mousse — blend silken tofu with melted dark chocolate and vanilla for a surprisingly rich, dairy-free mousse that sets in the fridge.
- No-bake cheesecake filling — cream cheese, lemon, caster sugar, and vanilla blended silky-smooth before pouring onto a biscuit base. Chill and serve.
- Blender brownies — black beans, cocoa powder, eggs, and maple syrup blended together and baked. High protein, genuinely rich flavour.
- Coconut ice cream — blend frozen coconut milk with sweetener and your flavouring of choice. Refreeze in a loaf tin for a scoopable texture.
- Peanut butter fudge bites — blend peanut butter, coconut oil, maple syrup, and cocoa. Pour into a tray, freeze until solid, then slice into pieces.
Nice cream deserves special mention here. Registered dietitians frequently recommend it as a genuinely satisfying whole-food alternative to ice cream — the frozen banana creates a soft-serve texture that’s surprisingly close to the real thing, with no additives or dairy required. Blend in a spoonful of peanut butter, a handful of frozen berries, or a tablespoon of cocoa powder and it becomes something worth making every week without any guilt attached.
Can You Make Nut Butters and Spreads in a Blender?
Yes — and homemade nut butter is one of the most satisfying things you can make. The process is straightforward, the result is considerably fresher than anything from a jar, and you control every single ingredient that goes into it.
How to Make Homemade Nut Butter in a Blender
- Roast your nuts — spread 2 cups of nuts on a baking tray and roast at 180°C (350°F) for 10 minutes. Roasting releases the natural oils and deepens the flavour significantly. Don’t skip this step.
- Blend in 30-second bursts — add the warm nuts to the blender immediately. The residual heat helps the oils release faster. Blend in short bursts and scrape down the sides between each one.
- Add oil if the blender struggles — if the mixture seizes or your machine starts to strain, add one teaspoon of neutral oil. Avocado and refined coconut oil both work well. Avoid olive oil, which overwhelms the nut flavour.
- Season and store — add a pinch of salt, and optionally honey, cinnamon, or a splash of vanilla extract. Blend for 10 more seconds. Transfer to a sealed jar and refrigerate for up to three weeks.
The spreads you can make this way include peanut, almond, cashew, macadamia, walnut, pistachio, sunflower seed, and mixed nut butters. Each has its own natural oil content, which affects how long the process takes. Cashews and macadamias are the easiest — they’re naturally soft and oily. Almonds take longer but produce an excellent result. Peanuts sit somewhere in the middle and are usually the most cost-effective starting point.
What Healthy Snacks Can You Blend?
Blenders make healthy snacking significantly more convenient. When the prep work takes two minutes instead of twenty, you’re considerably more likely to make the nutritious choice rather than reaching for something processed.
- Protein shakes — blend protein powder, milk or water, frozen banana, and a spoonful of nut butter. The texture is noticeably better than shaking in a bottle.
- Energy ball mixture — blend dates, rolled oats, and nuts into a thick dough, roll into balls, and refrigerate. No cooking required.
- Homemade baby food — steam fruit or vegetables until soft, then blend to your preferred consistency. Freeze in an ice cube tray for single-portion servings that thaw in minutes.
- Avocado yogurt dip — blend ripe avocado with Greek yogurt, lime juice, and a little garlic for a lighter, creamier alternative to standard guacamole.
- Blended oat bars (batter) — blend oats, ripe banana, and mixed nuts into a thick batter, spread into a lined tin, and bake for a dense whole-food snack bar.
- Cottage cheese dip — blend full-fat cottage cheese with lemon, herbs, and black pepper until completely smooth. High protein, genuinely versatile.
For single-serve snacks and shakes, a personal blender is often more practical than a full-size countertop machine — you blend directly in the travel cup, drink from it, and rinse it in 20 seconds. If that’s your primary use case, the personal blender guide at Blender Junkie covers the best options for individual portions without the commitment of a large appliance.
What Unexpected Things Can You Make in a Blender?
Some of the most interesting blender uses fall completely outside the food and drink category. These are the ones worth knowing about — partly because they’re surprisingly practical, and partly because they make you look at the machine in a completely different way.
- Breadcrumbs — stale bread blended in 10 seconds. Better texture than shop-bought panko and a genuinely useful way to use up leftovers.
- Powdered sugar — blend granulated sugar for 30 to 45 seconds to make a workable icing sugar substitute when you’ve run out.
- Whipped cream — pour cold double cream into the blender and pulse briefly. Faster than a hand whisk and produces a consistent result.
- DIY face masks — blend finely milled oats with raw honey and mashed banana for a gentle exfoliating mask used by estheticians and supported by dermatological research into each ingredient’s skin properties.
- Homemade pet food — blend cooked chicken, rice, and soft vegetables for a nutritious, additive-free meal. Check with your vet on proportions for your animal’s specific needs.
- Herb-infused oils — blend fresh basil, parsley, or chives with good olive oil, strain through muslin, and you have a vibrant chef-quality infused oil in under two minutes.
- Cocktail syrups and purées — blend fresh fruit with a little sugar and strain to create bar-quality purées and simple syrups for cocktails, mocktails, or desserts.
- Papermaking pulp — soak scrap paper in water overnight, blend into a fine pulp, and use it for handmade papermaking. A surprisingly satisfying craft project for both adults and children.
The herb-infused oil idea is worth trying even if you’re not particularly interested in professional cooking techniques. A blender produces a far more vibrant colour and deeper flavour than the traditional warm-steep method — the mechanical breakdown of the plant cells releases chlorophyll and volatile flavour compounds that gentle heat alone can’t extract. It takes about 90 seconds and costs essentially nothing.
Which Blender Do You Actually Need for All of This?
Not every recipe on this list requires the same machine. Matching your blender to your actual use case saves money and avoids the frustration of asking a machine to do something it genuinely cannot handle.
- Smoothies, soups, dips, and sauces: A mid-range blender at 600 to 900 watts handles all of these comfortably. Most people on a reasonable budget are well served here for the majority of their blending.
- Nut butters and grain flours: You need at least 1,000 watts and a quality blade assembly. Budget machines overheat and sometimes fail entirely before the job is done.
- Frozen cocktails and ice crushing: Look for a dedicated ice-crush setting, or at minimum 700 watts with wide blade coverage across the full base of the jar.
- Hot soups regularly: Any blender works, but models with purpose-built hot-blend settings eliminate the safety fuss around steam pressure build-up.
- Single portions on the go: A personal blender is almost always the more practical and cost-effective choice for individual servings.
- Blending directly in the pot: An immersion (stick) blender lets you blend soups and sauces without transferring to a jar — significantly less mess and fewer safety concerns with hot liquid.
If you’re unsure which machine is right given the range of things you want to make, the most useful single resource is a side-by-side comparison by use case rather than by spec sheet. The best blender for everything guide at Blender Junkie breaks this down across real-world categories with tested results, so you can make a decision based on what you actually plan to blend.
How Do You Get Better Results From Your Blender Every Day?
A few consistent habits make a noticeable difference in blender results, regardless of what you’re making. These take a few uses to become automatic, but once they are, you’ll notice the difference immediately.
- Layer liquids first — pour liquid into the jar before adding solids. This draws ingredients down into the blades and protects the motor from running dry against hard or frozen items.
- Start slow, ramp up — beginning at a low speed and increasing gradually prevents air pockets from forming around the blades and produces a smoother result.
- Use frozen fruit over ice — frozen fruit thickens and chills simultaneously. Ice dilutes as it melts. It’s an easy upgrade for smoothies, nice cream, and frozen desserts.
- Clean immediately using the self-clean method — fill the jar halfway with warm water, add a drop of dish soap, and blend for 20 seconds. Rinse and done. Dried-on residue takes five times longer to shift.
- Stay below two-thirds full — overfilling causes leaks, uneven blending, and strains the motor seal. It’s the single most common mistake new blender owners make.
- Rest hot liquids before blending — five minutes of cooling is enough. The steam pressure released by sudden heat in a sealed jar is the primary cause of blending accidents, and it’s entirely avoidable.
The self-cleaning blend is worth making into a non-negotiable habit. It takes 30 seconds total and keeps residue from baking onto the blade assembly — which is where most blender degradation and odour problems originate over time. Machines that are cleaned immediately after every use consistently last years longer than those that aren’t.
Frequently Asked Questions
What can I make with a blender besides smoothies?
Besides smoothies, you can make soups, sauces, dips, nut butters, pancake batter, frozen cocktails, ice cream, salad dressings, hummus, pesto, baby food, oat flour, whipped cream, infused oils, and breadcrumbs — among many other things. This guide covers 35 specific ideas across food, drinks, desserts, and a few non-cooking categories that most blender owners never discover.
Can I use a regular blender to make nut butter?
You can, but a high-powered blender — at least 1,000 watts — works significantly better. Lower-powered machines may overheat before the natural oils fully release from the nuts, leaving you with a crumbly paste rather than a smooth, spreadable butter. Adding one teaspoon of neutral oil helps move things along in any blender. Warming the nuts first also helps considerably.
Can you blend hot liquids safely?
Yes, with care. Let hot liquids cool for at least five minutes before adding them to the jar. Fill the jar no more than halfway, hold the lid down firmly with a folded cloth, and start on the lowest speed before increasing. Some modern blenders include a dedicated hot-blend setting that manages the pressure more safely — a genuinely useful feature if you make blended soups regularly.
What is the easiest thing to make in a blender?
Salad dressing is one of the simplest blender recipes you can make — add oil, vinegar, mustard, garlic, and seasoning, then blend for 15 seconds. Pancake batter and simple blended soups are equally beginner-friendly. All three require minimal prep, minimal ingredients, and clean up in under a minute using the self-clean method.
Do I need an expensive blender for these recipes?
No. Most recipes in this guide — smoothies, soups, dips, sauces, pancake batter, and frozen drinks — work well with a mid-range blender at 600 to 900 watts. Only nut butters, whole-grain flours, and fibrous vegetable juices genuinely need a high-powered machine. Start with what you have and upgrade based on the specific limitations you actually encounter rather than on spec sheet comparisons.
Can I use a blender to make baby food?
Yes — blenders are excellent for homemade baby food. Steam or boil vegetables and fruit until completely soft, add a little water to adjust consistency, and blend to a smooth purée. Pour into an ice cube tray and freeze. Each cube is roughly one serving, and they thaw in minutes. It’s far cheaper than shop-bought pouches and gives you complete control over what your child is eating.
How do I stop my blender from leaking?
The most common causes of leaking are overfilling (stay below two-thirds full), a loose blade assembly (check and tighten before every use), and worn gasket seals (inexpensive to replace and widely available for most major brands). Starting on a low speed before ramping up also significantly reduces the pressure spike that causes leaks in the first few seconds of blending.
Start With One New Recipe This Week
If your blender has mostly been making smoothies, pick one category from this guide and try something new this week. The jump from smoothies to blended soup tends to surprise people the most — it takes about 25 minutes from start to finish, uses ingredients most kitchens already have, and consistently produces a result that feels restaurant-quality for almost no effort.
After that, work through the sauces section. Homemade hummus and pesto are genuinely game-changing — once you’ve made them from scratch, the shop-bought versions taste noticeably flat by comparison. By week three, attempt nut butter. It’s the recipe that makes you feel like you’ve finally unlocked what the machine is actually capable of.
The blender on your counter is capable of a great deal more than you’ve been asking it to do. These 35 ideas are a starting point — not an ending one. Pick one, blend something new tonight, and go from there.