We’ve cracked the code on taming those ear-splitting morning blends. Start by positioning your blender away from walls and corners to minimize echo. Add dense rubber mats underneath to absorb vibrations, or build a DIY sound enclosure using lined storage bins. Pre-prep ingredients the night before to reduce blend times, and consider upgrading to quieter equipment. These proven techniques can transform your kitchen from sonic boom to whisper room – and there’s more to discover.
Strategic Placement for Maximum Sound Control
When it comes to taming your blender’s roar, strategic placement is your first line of defense.

We’ll show you how to reduce noise through smart positioning that creates a natural sound enclosure effect.
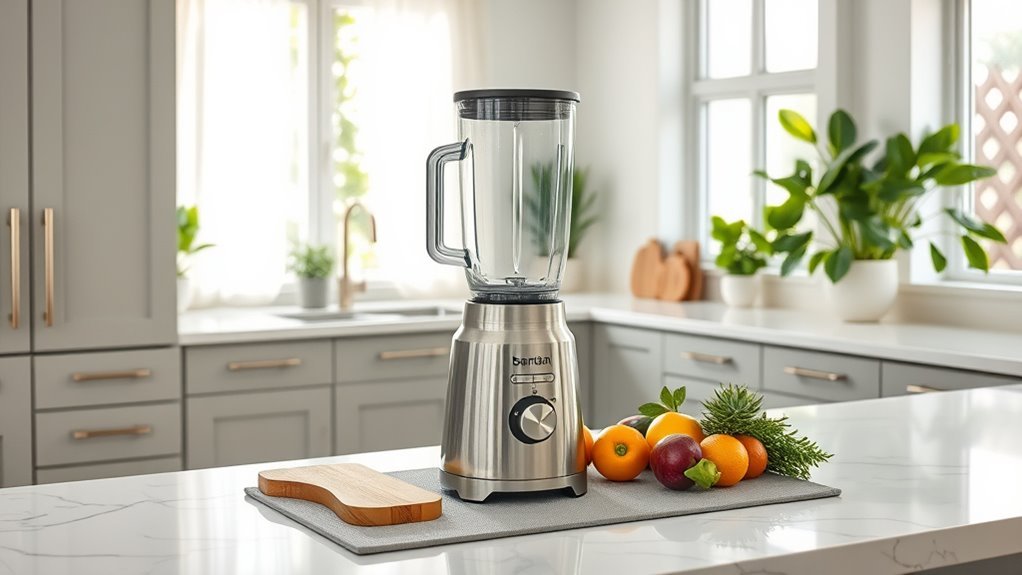
Start by placing your blender at least two inches from walls – this simple move immediately cuts down on echoing sounds.
Center it on your counter to prevent nearby surfaces from amplifying the racket. Trust us, it makes a difference.
For the ultimate quiet blender model setup, choose an interior room away from bedrooms and home offices.
You’ll want to soundproof naturally by avoiding concrete walls, which are notorious sound reflectors.
Remember, every surface near your blender can either help or hinder your quest for peaceful blending. Additionally, investing in a high-performance blender can significantly reduce noise levels due to their more efficient motor design.
Position wisely, blend quietly.
Soundproofing Materials and Mat Solutions
To truly tame your blender’s sonic assault, you’ll need the right arsenal of sound-dampening materials.
We’ve tested countless solutions to reduce blender noise, and these proven options deliver results worth your investment.
- Dense rubber mats (1/4 to 1/2 inch thick) absorb vibrations and block sound transfer
- Self-adhesive soundproofing pads under blender feet isolate machine movement
- Custom enclosure boxes lined with acoustic foam contain noise while maintaining access
- High-density insulation foam wrapping minimizes impact noise during operation
- Pre-made soundproof enclosures eliminate DIY hassle with professional-grade dampening
Incorporating a high-performance blender can also significantly impact blending efficiency and noise reduction.
Don’t let your morning smoothie wake the neighbors.
These soundproofing materials transform your noisy blender into a considerate kitchen companion.
Whether you choose a simple rubber mat or go all-in with an enclosure box, you’ll notice the difference immediately.
DIY Sound Enclosure Techniques

Building your own blender sound enclosure isn’t rocket science – it’s a straightforward DIY project that’ll slash noise levels by up to 70%.
We’ll help you create an airtight container using a plastic storage bin that’s large enough to house your blender comfortably.
Line the enclosed space with mass-loaded vinyl sheets and rubber matting to absorb vibrations and create an insulated barrier.
Cut a hole in the lid for the blender jar, and place a 1-inch rubber mat underneath to prevent counter vibrations.
The result? A sound-blocking fortress that lets you blend without waking the neighborhood.
Pro tip: Add handles to make your enclosure portable.
You’ll maintain easy access while keeping the noise-reducing benefits intact.
It’s a simple solution for quieter, more peaceful blending.
Timing and Pre-Preparation Methods
Smart timing and prep work are your secret weapons for quieter smoothie-making. We’ll show you how to reduce the amount of sound your powerful motor produces through strategic pre-preparation.
One of the easiest ways to reduce whole blender noise is timing your blend sessions wisely.
- Blend smoothies the night before when noise isn’t an issue
- Pre-measure and chop ingredients for faster blending time
- Store blended mixtures in airtight Mason jars overnight
- Give containers a quick shake in the morning to remix
- Test different recipes to identify those requiring minimal blend time
These methods slash morning noise while maintaining smoothie quality.
Equipment Modifications and Upgrades

When it comes to taming your blender’s roar, equipment modifications and strategic upgrades are your most powerful weapons.
Let’s start with the foundation: install sound isolating pads and dampening mats under your blender to crush those counter vibrations before they start.
Ready to level up? Invest in a high-quality blender with sound dampening technology.
These machines pack a powerful motor that gets the job done faster, reducing your noise exposure.
For the ultimate sound solution, we’re talking soundproof box territory – lined with acoustic foam, it’s like putting your blender in a recording studio.
Frequently Asked Questions
How to Make Smoothies Quietly?
We’ll help quiet your smoothie prep with sound-absorbing mats, folded towels, or silicone pads under the blender. Let’s schedule blending during off-peak hours and consider investing in noise-reduction gadgets.
How to Muffle Blender Noise?
Let’s reduce blender noise using sound dampening materials like rubber mats under the base, wrapping the container with kitchen towels, or creating a soundproof box with acoustic foam lining.
Is There a Quiet Blender for Smoothies?
We’ve found excellent quiet blender options like Vitamix’s “The Quiet One” and Breville’s Super Q, which use advanced noise reduction technology. These silent blenders create peaceful smoothies without disturbing your household.
How Do You Blend Without Noise?
Ready to make your blender whisper-quiet? We can reduce noise by using vibration dampening mats, soundproofing the area, and choosing quieter blenders with adjustable speeds. Place towels underneath for extra sound absorption.