We’ve all been there—staring at a crusty blender after making that delicious smoothie or soup. Let’s face it, cleaning up isn’t the fun part, but it doesn’t have to be a chore either. With a few simple tricks, you can have your blender spotless in under a minute, without the dreaded scrubbing around those sharp blades. These quick methods will save your time and, honestly, might even save your fingers too.
The 30-Second Self-Cleaning Method
There’s a thirty-second trick that’ll save you countless minutes of scrubbing your blender—and we’ve been using it for years.

It’s ridiculously simple, actually.
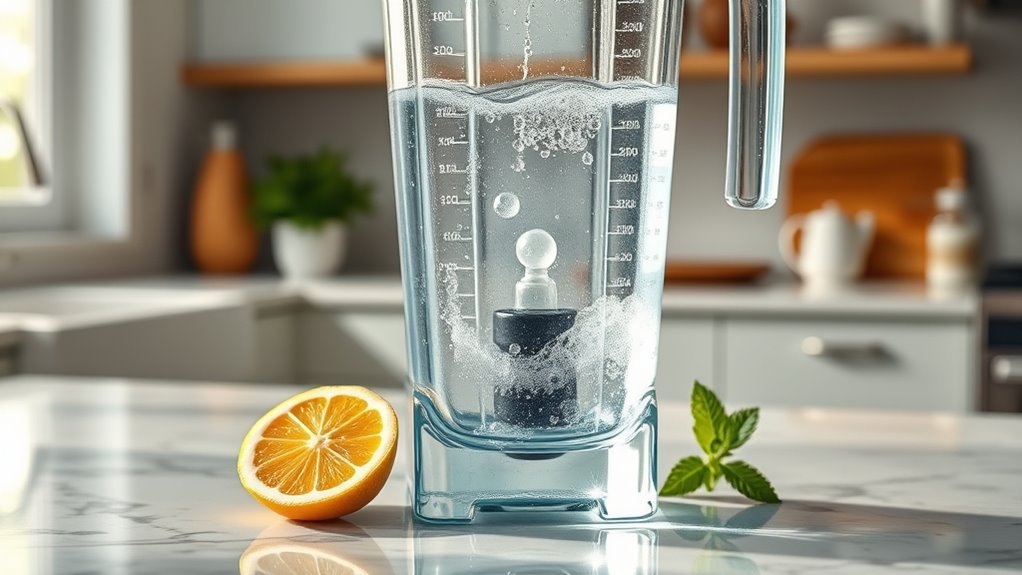
Fill your blender halfway with hot water, add a drop or two of dish soap, and secure the lid.
Then—and this is the magic part—blend on high for exactly 30 seconds.
The soapy water creates this powerful vortex that scrubs everything clean!
When you’re done, just rinse with hot water.
No need to stick your fingers near those scary-sharp blades, which, let’s be honest, is probably how most blender injuries happen.
We’ve found this works best if you do it right after use, before smoothie remnants or whatever turn into cement-like substances.
This cleaning method is particularly effective for high-performance blenders because they have more robust blades and powerful motors.
Essential Supplies for Effective Blender Cleaning
Gathering the right cleaning supplies makes blender maintenance so much easier—and we’ve tested dozens of options to find what really works.
We’ve found that dish soap, specifically Seventh Generation Dish Liquid, cuts through even the toughest smoothie residues.
Combine it with warm water (just enough to fill halfway) and you’ve got a powerful cleaning solution without any special tools.
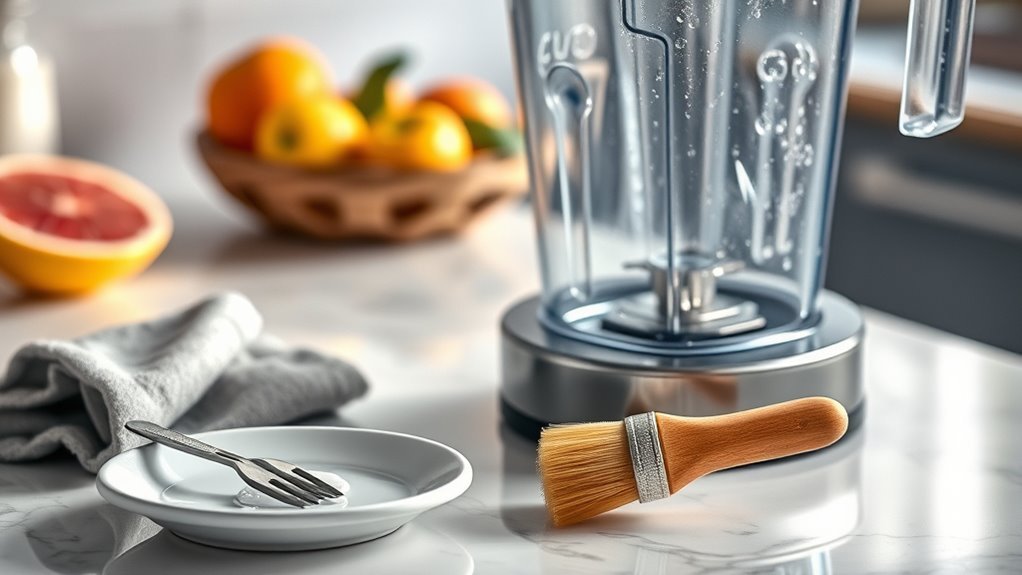
For those stubborn spots around blades, grab an OXO Good Grips Bottle Brush—it’s a game-changer, trust me.
Don’t forget a clean towel to securely hold the lid while cleaning! That’s a mistake I’ve made before, ending up with a soaked kitchen.
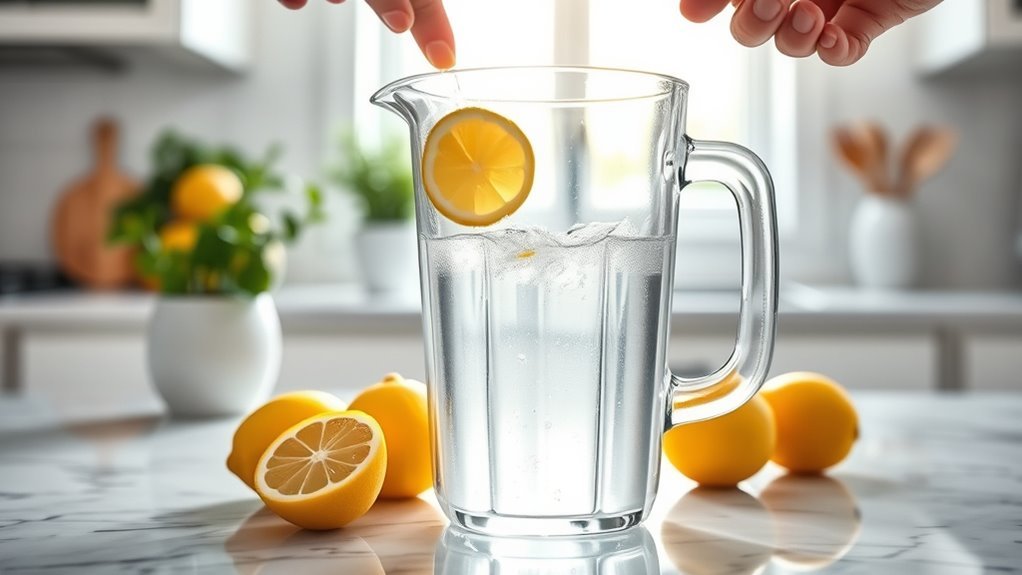
For extra-tough buildup, a splash of vinegar or lemon juice works wonders, but they’re usually not necessary for daily cleaning.
Tackling Stubborn Residue and Build-Up
We’ve all faced that dreaded “blender cement” when smoothie ingredients harden into stubborn build-up that seems impossible to remove.
Let’s tackle this common problem with a simple but effective approach: blend hot water with a few drops of dish soap for 30 seconds to loosen residue, adding vinegar or lemon for extra cleaning power.
For those super sticky situations like nut butter remnants, you’ll want to extend the cleaning time to 5 minutes and use a bottle brush to reach those tricky spots around blades and under the rubber ring.
Additionally, incorporating proper care routines as recommended can help maintain your blender’s performance over time.
Stubborn Stains Solution
Tackling stubborn stains in your blender doesn’t have to be a nightmare.
When those dried smoothie remnants refuse to budge, we’ve found that the blending method works wonders.
Simply fill your blender halfway with hot water, add a drop of dish soap (we recommend Seventh Generation), and blend on high for about 30 seconds.
For those really stubborn situations, try these approaches:
- Add extra dish soap to the hot water mixture for oily residues
- Clean a blender immediately after use—waiting even 10 minutes makes the job harder
- Disassemble the blender to clean under the rubber ring where gunk loves to hide
- For nut butter residue, you might need a second round of soap-water blending
Trust us, this approach saves you from the frustration of scrubbing by hand!
Preventing Dried Residue
While the satisfaction of a freshly blended smoothie is unmatched, the dread of cleaning dried residue can quickly dampen your enthusiasm. We’ve all faced that stubborn peanut butter residue that seems to cement itself to the blender walls when left too long.
| Time Frame | Action | Benefit |
|---|---|---|
| Immediately | Add a drop of soap + hot water | Prevents hardening |
| Within 30 seconds | Quick blend with soapy water | Loosens particles |
| For nut butters | 5-minute soak | Tackles tough buildup |
Don’t wait until tomorrow to clean your blender! Trust us, those extra 60 seconds right after use will save you from scrubbing later. It’s like dental flossing—a little prevention beats the alternative. Simply add a drop of dish soap, some hot water, and let the blender clean itself with a quick pulse.
Deep Cleaning Techniques
Even the most diligent quick-cleaning routines need occasional reinforcement with a thorough deep clean.
When washing it by hand isn’t cutting it anymore, it’s time for the best way to clean those stubborn spots.
We’ve found that disassembling your blender is actually the secret to reaching those hidden areas where residue loves to hide.
- Add a tablespoon of vinegar to hot soapy water and blend for 30 seconds—it works wonders on tough build-up
- Use a bottle brush (we love the OXO Good Grips) to scrub around blades and under rubber rings
- Plan for about 5 minutes of deep cleaning after making sticky things like nut butters
- Don’t forget the spout! A skinny silicone spatula can reach spots that brushes can’t
Safety Precautions When Cleaning Blender Blades
Handling blender blades requires extreme caution—those sharp edges don’t become friendly just because the blender’s off!
The simplest way to clean your blender without risking a trip to the ER is to skip cleaning by hand altogether.
Just fill the pitcher with warm water and add a drop of dish soap, then let the blender clean itself with a quick pulse.
When you absolutely must clean your blender by hand, always unplug it first—seriously, this isn’t something to forget!
We like to use a bottle brush to navigate around those treacherous blades.
And don’t forget to secure the lid with a towel when blending that soapy water.
Trust me, hot soapy water on your shirt isn’t the fashion statement you’re going for.
Maintenance Tips for Extending Your Blender’s Life
Now that we’ve covered safety, let’s talk about keeping your blender running smoothly for years to come.
The easiest way to clean your blender is actually a quick 30-second blend with hot water and dish soap right after use.
This prevents stubborn buildup that can damage the mechanics over time.
For long-term maintenance, we’ve found these practices make all the difference:
- Disassemble the blender every few uses to clean under the rubber seals
- Pay special attention to the blades where banana and peanut butter can create cement-like residue
- Never leave your blender pitcher with dried-on ingredients overnight
- Return a completely dry pitcher back on the base to prevent moisture damage
Trust us, these simple habits will add years to your appliance’s life!
Time-Saving Hacks for Busy Households
Let’s talk about the ultimate time-saver for busy households—the self-cleaning blender method.
We’ve found that this five-minute cleanup routine (actually, it’s more like a one-minute routine) can transform your relationship with your blender by simply blending hot water with a drop of dish soap.
The best part? You’ll never again have to choose between making that quick smoothie and facing the dreaded cleanup that might normally follow.
Self-Cleaning Blender Method
Busy schedules demand smart solutions, and that’s exactly what the self-cleaning blender method delivers for households on the go.
We’ve found this professional kitchen trick transforms cleanup from a chore to a breeze—taking just one minute compared to tedious scrubbing or dishwasher cycles.
To use your blender’s self-cleaning power:
- Fill the pitcher halfway with hot water
- Add one to two drops of dish soap
- Blend on high for about 30 seconds
- Rinse thoroughly with clean water
This method works wonders when done immediately after making that peanut butter-banana smoothie.
Plus, you’ll never have to worry about cutting yourself on those sharp blades!
We’re convinced this hack is why we’re actually using our blender more often now—cleanup’s that simple.
Five-Minute Cleanup Routine
The self-cleaning method we just covered works brilliantly, but what if we told you there’s an entire five-minute routine that’ll revolutionize how you maintain your blender?
Here’s our favorite hack: Fill your Personal Blender halfway with hot water, add a drop of the best dish soap you have, and blend on high for 30 seconds.
That’s it! The blender actually cleans itself—no scrubbing needed.
For smoothies, it’ll take just a minute or two, while tougher jobs might need the full five.
We’ve found this works perfectly for both glass and plastic models.
The best blender maintenance tip? Do this immediately after use to prevent dried-on gunk.
It’s way faster than waiting hours for a dishwasher cycle, and honestly, your future self will thank you!
Frequently Asked Questions
How to Clean a Blender After Use?
Like magic, we’ll clean our blender by filling it halfway with hot water, adding dish soap, and blending for 30 seconds. For thorough blender maintenance, rinse well before dishwasher use or storage.
Do You Have to Wash a Blender After Every Use?
Yes, we highly recommend washing your blender after every use. It’s an essential part of your daily routine that prevents hardened residues, maintains performance, and extends lifespan. Positive user habits include immediate cleaning.
How to Clean Grime off Blender?
We’ll tackle blender grime by filling halfway with hot water and soap, blending for 30 seconds for residue removal. For stubborn buildup, add vinegar before blade scrubbing with a bottle brush. Immediate cleaning guarantees grime prevention.
Can I Use Vinegar to Clean My Blender?
Yes, we recommend using vinegar for blender cleaning! Its acidic properties break down residue effectively. It’s a safe, eco-cleaning option that works perfectly with hot water and dish soap for thorough results.