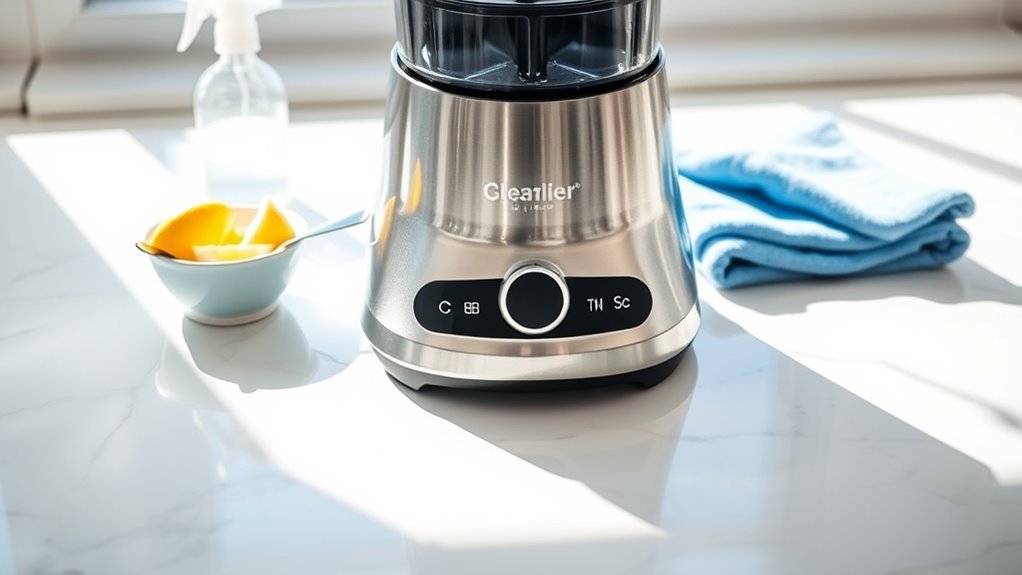
Did you know that 78% of blender problems stem from improper motor base cleaning? We’re often so focused on washing the jar that we neglect the powerhouse of our appliance. While it might seem intimidating to clean electrical components, we’ve discovered it’s actually pretty straightforward—as long as you follow some critical safety steps. Let’s explore how to keep that motor running smoothly without risking damage or, worse, electrical hazards.
Why Proper Cleaning of Your Blender Base Matters
Why do we often overlook the blender base when cleaning?

I think it’s because we’re focused on the jar where food touches, forgetting that the motor base needs attention too.
But here’s the thing – moisture reaching the motor can cause electrical damage or even destroy your appliance completely.
Regularly wiping down your motor base with a damp cloth removes food residue and dust that, if left alone, could become a breeding ground for bacteria.
You know what that means for your morning smoothie? Yikes.
Well, neglecting the base isn’t just unhygienic – it’s also costly.
Proper maintenance makes your blender more efficient and longer-lasting, saving you money in the long run.
Plus, you’ll avoid those harsh chemicals that might contaminate your food.
Essential Safety Precautions Before You Begin
Now that we understand why cleaning your blender base matters, let’s talk about safety first.
We’ve learned the hard way (I know I have!) that blenders can be dangerous if not handled properly.
Before you even think about cleaning, there are essential precautions you should take to avoid any accidents.
- Always unplug your blender first—seems obvious, but it’s easy to forget when you’re in a hurry
- Never, ever submerge the base with a soft cloth instead
- Keep your fingers well away from the blades—those things are sharp, trust me!
- Make sure everything’s completely cool and dry before starting the cleaning process
Gathering the Right Cleaning Supplies
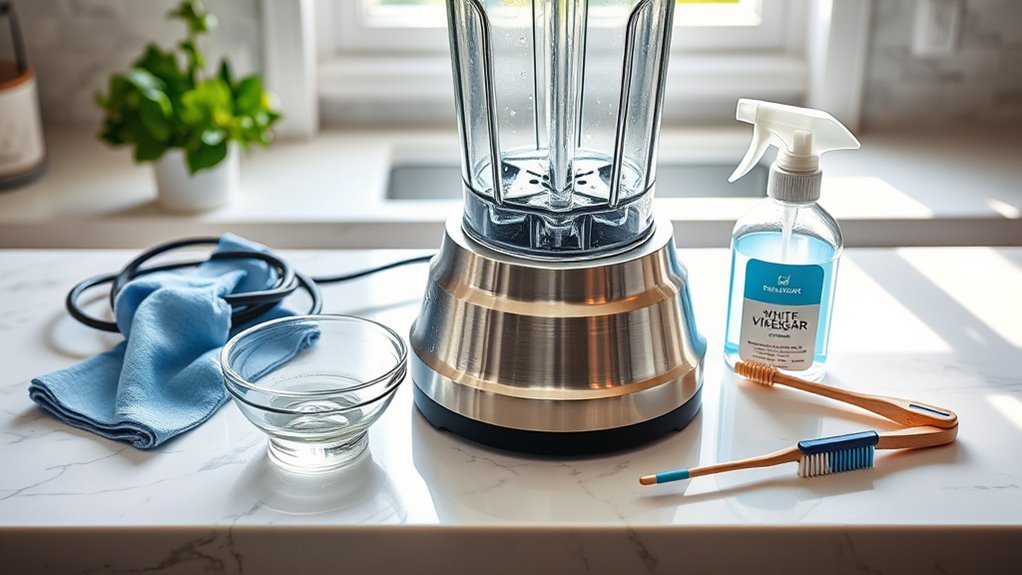
The right cleaning supplies can make blender base maintenance a breeze instead of a chore.
We’ve found that Seventh Generation Dish Liquid works wonders—it’s gentle but effective, just what you need after Wirecutter’s impressive 65-hour research confirmed its safety.
You’ll also want to grab a microfiber cloth, which won’t scratch your blender’s surface when dampened with warm water and add a tiny bit of that mild soap.
For stubborn spots, baking soda can be your best friend.
Just sprinkle a little on tough residue, but keep it away from the motor itself—trust me, that’s a headache waiting to happen.
Don’t forget a good drying rag too.
We always make sure everything’s completely dry before reassembly because, well, electricity and water aren’t exactly besties.
Step-by-Step Guide for Cleaning the Motor Base
Let’s start our cleaning process by always unplugging the blender base—safety first, right?
We’ll then want to gently wipe down the motor housing with a slightly damp cloth and mild soap, being careful not to press too hard on any buttons or dials.
It’s vital we keep water away from any electrical components, so never—and I mean never—submerge your blender base in water or you’ll be shopping for a new one sooner than expected.
Unplug Before Cleaning
Before you even think about cleaning your blender’s motor base, safety must come first—unplug that power cord from the wall outlet!
We’ve seen too many close calls when people try to clean their blender while it’s still connected to power.
Trust us, electricity and water don’t mix well.
When you clean your blender properly, always start with this vital safety step.
Here’s why it matters:
- Prevents accidental activation while you’re wiping down components
- Eliminates any risk of electrical shock—which, believe me, is no joke
- Allows you to handle the base freely without worrying about buttons getting pressed
- Follows expert recommendations from professionals who test kitchen gear for a living
It’s such a simple step, but one that’ll keep you safe every time!
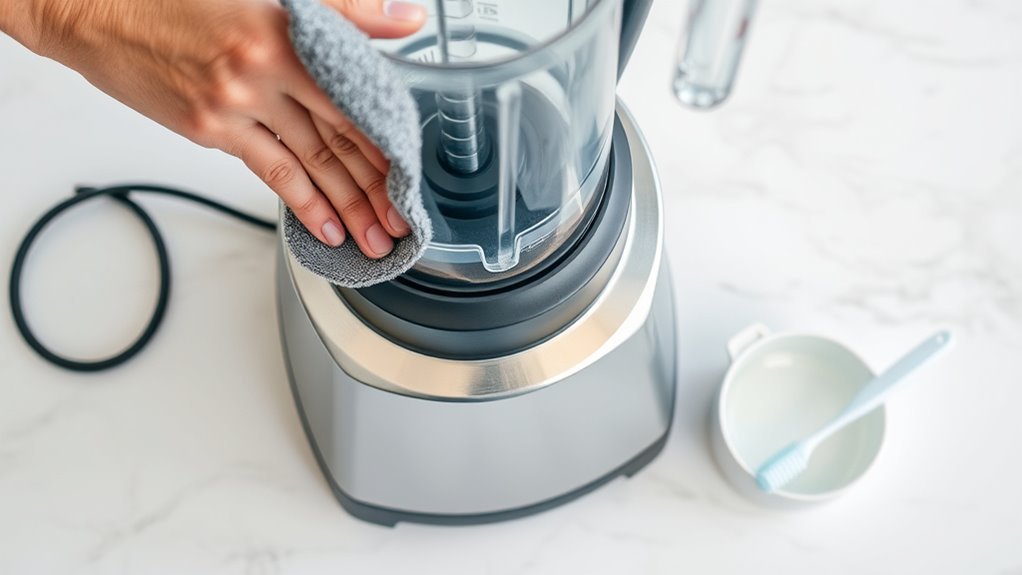
Wipe-Down Technique
Now that your blender’s safely unplugged, we’re ready to tackle the motor base itself.
Grab a soft microfiber cloth and dampen it slightly—not soaking wet!
Add a drop of dish soap to create a gentle cleaning solution.
Wipe the base thoroughly, paying extra attention to those grimy spots where smoothie splatter tends to accumulate.
You know what I’m talking about!
Just be careful to keep soapy water away from any vents or openings—those are basically no-go zones for moisture.
Once you’ve removed all residue, take a clean, dry rag and wipe everything down completely.
We don’t want any lingering moisture that might damage the electrical components.
This quick wipe-down after each use is honestly the best way to keep your blender running smoothly for years.
Avoid Water Damage
When it comes to protecting your blender’s motor base, water is your number one enemy.
We’ve seen too many perfectly good blenders ruined because someone thought a quick rinse wouldn’t hurt.
Trust us, it will!
Never, ever submerge your motor base in water—not even a little bit of hot water for “deep cleaning.”
That’s just asking for trouble.
To keep your blender’s electrical components safe:
- Always unplug before cleaning—safety first, folks!
- Use only a slightly damp microfiber cloth to wipe down the base
- Avoid spraying cleaning solutions directly onto the base—spray your cloth instead
- Immediately dry the base with a clean rag after wiping
Handling Stubborn Stains and Spills
Even the most careful blender users will eventually face stubborn stains and spills on their blender base.
When this happens, our favorite cleaning tip is to create a paste using baking soda and water.
This is honestly the Easiest Way to Clean those tough stains—just apply the paste to the affected area and gently scrub with a damp microfiber cloth.
For fresh spills, don’t wait! Immediately wipe them up with a soft cloth and mild dish soap before they harden.
If you’re dealing with particularly stubborn residue, sprinkle a bit of baking soda directly on the stain, let it sit for a few minutes, then wipe away.
Remember, never submerge the base in water—spot cleaning is safer.
After cleaning, make sure to thoroughly dry the base with a clean rag.
Regular maintenance, such as these cleaning methods, can help ensure your high-performance blender lasts for years with proper care.
Maintaining the Centering Pad and Connections
Let’s now tackle those stubborn residues that hide in and around your blender’s centering pad—removing it completely from the base is actually recommended in most maintenance manuals.
We’ve found that gentle cleaning with a damp cloth and mild soap works wonders, but make sure everything’s completely dry before reassembly to prevent any electrical damage.
Regular maintenance of these connections isn’t just about cleanliness; it’s about extending your blender’s life and keeping it running at peak performance.
Removing Stubborn Residue
Tackling stubborn residue on your blender’s centering pad requires careful attention to avoid damaging the critical connections to your motor.
We’ve found that after multiple sessions of blend on high, ingredients can really get caked onto these components.
Remember, this pad connects your blender jar to the motor, so keeping it clean is essential for performance and safety.
For those particularly tough messes, we recommend:
- Gently removing the centering pad from the base
- Using a soft-bristled brush to loosen residue without scratching
- Applying mild dish soap with a damp cloth (not too wet!)
- Thoroughly drying with a rag before reattaching
Always inspect the area regularly for buildup.
We actually damaged a blender once by ignoring this maintenance—trust me, you don’t want that expensive mistake!
Preventing Electrical Damage
Properly maintaining your blender’s electrical components goes hand-in-hand with cleaning away residue. The centering pad mightn’t seem important, but it’s actually vital for those high speed blends you’ll want to make next time! Always unplug your blender before you start cleaning—trust me, electrical shocks are no joke.
We’ve seen too many people forget to remove and properly dry the centering pad.
This small component needs special attention: wipe it gently with a damp cloth, never submerge it in water, and make sure it’s completely dry before reassembling.
Well, think of it as the heart of your blender’s electrical system—if it gets damaged by moisture or corrosion, your appliance might just… stop working altogether.
Regular inspection for wear or residue buildup will save you headaches down the road.
Common Mistakes to Avoid When Cleaning
When cleaning your blender base, even the most careful among us can make mistakes that might damage this essential kitchen tool.
It’s in our legitimate interest to store and access information about proper care, since simple errors can drastically shorten your blender’s lifespan.
We’ve seen these common mistakes too often:
- Submerging the motor base in water (yikes, electrical disaster waiting to happen!)
- Cleaning while still plugged in—wait, that’s dangerous!
- Using harsh abrasive cleaners that scratch and damage surfaces
- Putting the base in the dishwasher when it should be hand-washed only
Remember to thoroughly dry the base after cleaning.
In our experience, moisture that seeps into the motor housing is probably the number one reason blenders fail prematurely.
Think of your blender base like a smartphone—they both hate unexpected baths!
To extend the lifespan of your blender, consider its powerful motors that require careful maintenance to ensure ongoing performance.
Regular Maintenance Tips for Longevity
Regular maintenance isn’t just about keeping your blender looking shiny—it’s the secret ingredient to ensuring your appliance lasts for years.
We’ve found that wiping down the base with a damp microfiber cloth after each use prevents that stubborn buildup that can, you know, actually wear down your motor over time.
Always unplug before cleaning—seriously, this isn’t just cautious advice, it’s essential for safety and longevity.
I think the gentlest approach works best; mild dish soap and a soft brush will do the trick without damaging surfaces.
Oh, and make sure the base is completely dry before putting everything back together.
Moisture is… well, it’s basically the enemy of electronics.
For quick maintenance between deep cleans, try blending warm soapy water for a few seconds—works like a charm!
Frequently Asked Questions
How to Clean the Motor Base of a Blender Safely?
Shhh…we’re about to share a secret! We always unplug first, then wipe with a damp cloth. Never submerge! Blender lubrication stays protected when we avoid moisture. Make sure dry base storage afterward.
How Do You Clean a Blender Motor?
We always unplug first, then wipe with a damp cloth. For preventive maintenance, use a blower method to remove dust from vents. Never submerge in water—it damages the motor.
Can You Wash the Bottom of a Blender?
No, we’d love to witness color fading from your kitchen as electrical sparks fly! Instead, wipe the base with a damp cloth and mild soap for odor removal. Never submerge the motor.
How to Disassemble a Blender to Clean?
We’ll need proper tools for safe disassembly. First, unplug it! Remove the jar, then detach the lid, seals, and collar. Finally, take off the centering pad, handling blades carefully throughout.