We’ve been using immersion blenders in our test kitchen for years, and honestly, they’re one of those tools we can’t believe more home cooks don’t have. Think about it—no more transferring hot soup to a blender in batches or dealing with splattered walls when making smoothies. They’re compact powerhouses that transform cooking tasks in seconds. The right immersion blender can revolutionize how you prepare everything from velvety soups to homemade mayonnaise, but choosing the wrong one might leave you frustrated.
Some of the links in this article may be affiliate links. If you make a purchase through these links, we may earn a small commission at no extra cost to you. Thank you.

What Is an Immersion Blender and Why Every Kitchen Needs One
The humble immersion blender – or stick blender as we sometimes call it – might just be the unsung hero of your kitchen arsenal. We’ve found this handheld wonder transforms cooking with minimal cleanup and maximum efficiency. It’s not just about functionality; kitchen aesthetics matter too, and these sleek devices won’t clutter your countertop like bulky alternatives.
What makes them essential? Well, they let you blend soups right in the pot (no more dangerous transfers of hot liquids!) and whip up quick smoothies in virtually any container. The appliance ergonomics are honestly impressive – most weigh less than two pounds and fit comfortably in your hand. Additionally, their versatility makes them suitable for various tasks, from making sauces to pureeing ingredients efficiently using high-performance blenders.
We think once you try emulsifying a homemade mayo or pureeing a silky soup directly in the cooking vessel, you’ll wonder how you ever managed without one.
Choosing the Right Immersion Blender: Power, Features, and Attachments
When shopping for an immersion blender, we’ve found that power matters more than you might initially think.
For those thick smoothies or purées, you’ll want at least 200 watts—anything less and you’ll notice the motor stability struggling with tougher ingredients.
We always recommend looking for models with multiple speed settings. It’s like having different gears for different jobs, you know?
And don’t overlook the ergonomic design—your hand will thank you after blending that big batch of soup!
Attachments are probably where you’ll get the most value. A whisk for whipping cream, a chopper for nuts or herbs—these extras transform your blender from a one-trick pony into a versatile kitchen tool.
Most importantly, choose durable materials that’ll withstand regular use. Additionally, selecting models with high-quality motor components can significantly extend your blender’s longevity.
Pureeing Soups and Sauces: Techniques for Silky Smooth Results
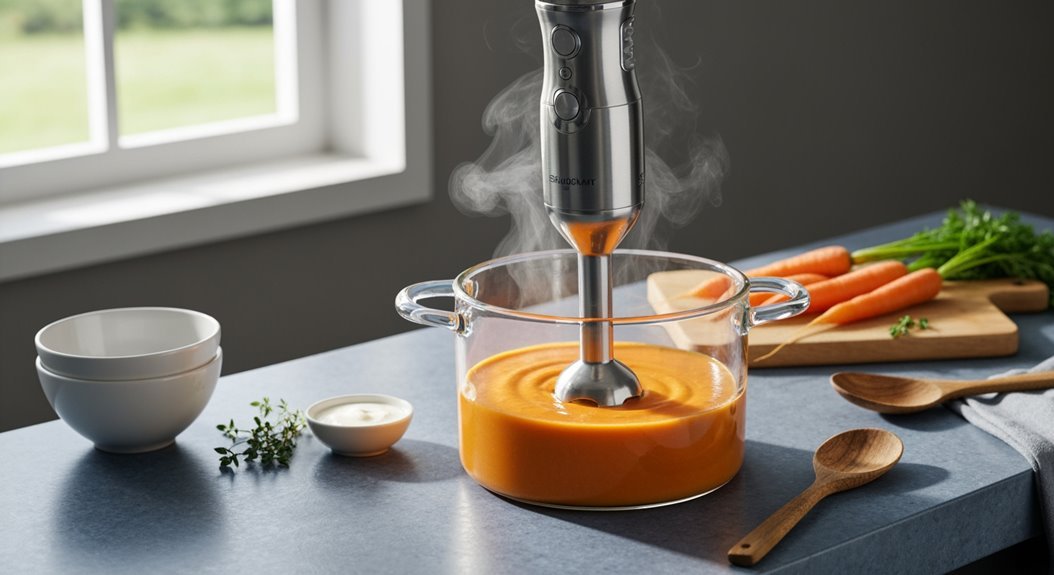
Mastering the art of pureeing soups and sauces with an immersion blender truly transforms ordinary meals into restaurant-quality dishes. We’ve found that proper technique is everything for texture control. Always submerge the blender before powering it on—trust us, your kitchen walls will thank you!
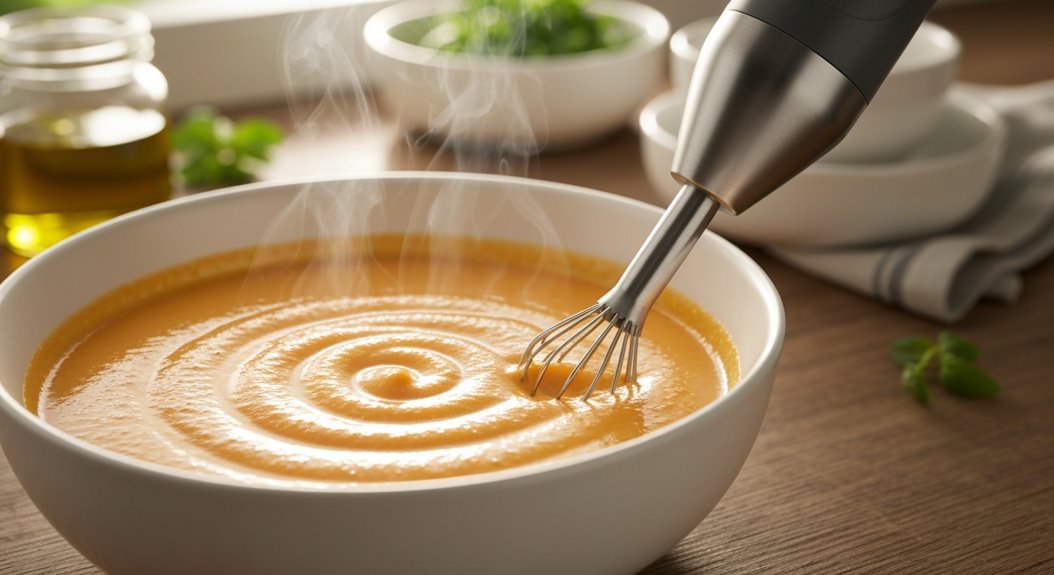
For silky results, we use varying blending angles, moving gently up and down rather than in aggressive circles. Start slow, then increase speed as needed.
| Technique | Result | When to Use |
|---|---|---|
| Shallow angle | Coarser texture | Chunky soups |
| Vertical position | Medium blend | Most applications |
| Tilted blending | Ultra-smooth | Delicate sauces |
We love blending directly in the pot—it’s one less dish to wash, right? And for that extra creaminess, keep blending a few seconds longer than you think necessary.
Beyond Soups: Making Smoothies, Shakes, and Emulsified Dressings
Your trusty immersion blender isn’t just a one-trick soup pony! It’s actually a powerhouse for creating frosty beverages like smoothies and milkshakes right in the container. We love how it blends frozen fruits and ice in seconds without transferring everything to a bulky blender.
The secret to perfect emulsified dressings? Well, it’s all in the technique. Start at a low speed—trust me, you don’t want that oil splattering everywhere—and gradually increase as your mixture thickens.
For mayonnaise, slowly drizzle in oil while blending, and you’ll get that creamy, stable texture every time.
Don’t forget the whisk attachment! It’s probably the quickest way to beat eggs for the fluffiest omelets you’ve ever made. Less effort, better results—what’s not to love?
Advanced Applications: Whipping, Nut Butters, and Baby Food Preparation
Although most people think of soups when they reach for their immersion blender, the advanced applications we’re about to explore will completely transform your kitchen game.
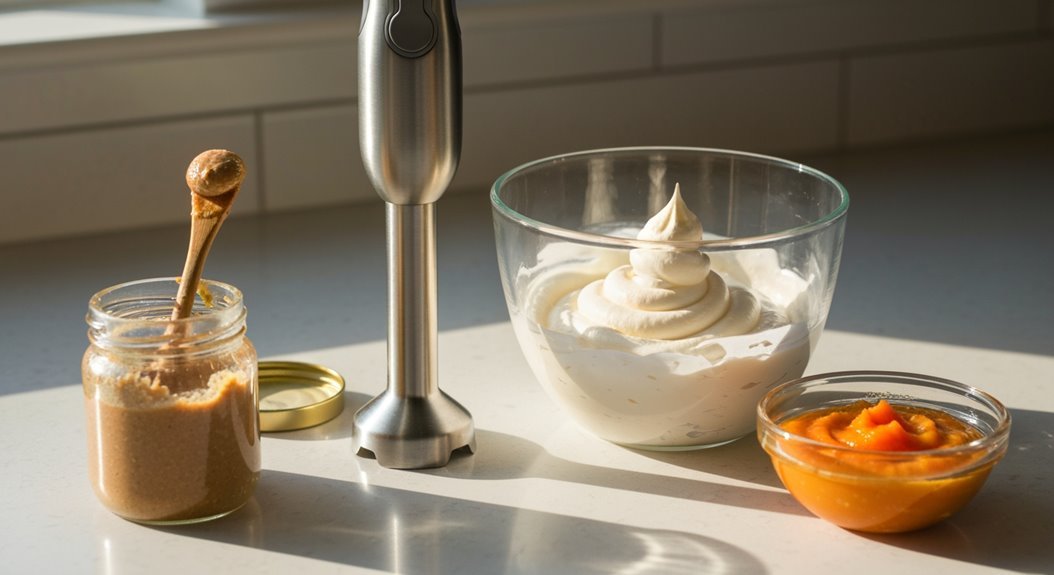
We’ve discovered that whipping cream takes mere seconds with the whisk attachment—it’s almost too easy!
For homemade nut butters, you’ll need at least 300 watts of power and maybe a splash of oil for smoothness. Try adding ginger infusions to almond butter for a zingy twist.
When making baby food, we love how we can create various textures directly in the cooking pot.
The multiple speed settings are perfect for controlling consistency, and herb emulsions add gentle flavors that babies actually enjoy.
I think—wait, I know—that once you’ve tried these techniques, you’ll wonder why you ever limited your immersion blender to just soups!
Safety Tips and Best Practices for Handheld Blending
When it comes to immersion blender safety, we’ve learned that a few simple practices can prevent kitchen disasters. Always unplug your device before switching attachments or cleaning – it’s probably the most overlooked safety step we see.
Keep those blades fully submerged while blending, unless you’re aiming for a kitchen splatter painting!
For battery safety, don’t store rechargeable models completely drained. We think it’s best to charge them before extended storage periods.
Speaking of storage tips, never wrap the cord tightly around your blender – this damages internal wiring over time. Instead, loosely coil it and store your blender upright in a dry cabinet.
And remember, the motor handle should never take a bath – only the detachable parts can be submerged!
Cleaning and Maintaining Your Immersion Blender for Longevity
Let’s talk about caring for your trusty kitchen companion so it’ll last for years to come.
We’ve found that taking a minute for quick clean-up after each use (especially for those protein smoothie remnants that harden quickly!) will save you headaches later on. Proper storage—hanging on a hook or tucked safely in a drawer with the cord loosely wrapped—not only keeps your counter clutter-free but also prevents those annoying issues like bent blades or frayed cords.
These problems can turn your blending session into a frustrating experience.
Quick Clean-up Techniques
Why is cleaning your immersion blender so important? Well, besides the obvious hygiene reasons, proper maintenance prolongs the life of your tool and guarantees it performs at its best every time.
For those busy weeknights, quick rinses are your best friend. After blending, simply fill a cup with warm, soapy water and pulse the blender head for a few seconds—it’s like the blender cleans itself!
For more stubborn residue, brush cleaning is essential. We’ve found that a small dish brush works perfectly to get between the blade guard crevices where food loves to hide.
Remember to always unplug before cleaning, and if you’re in a real hurry, that pulse-cleaning technique will save your sanity until you have time for a deeper clean.
Storage Best Practices
Proper storage is just as important as thorough cleaning when it comes to extending the life of your immersion blender. After we’ve thoroughly dried all components, we need to find the perfect home for our kitchen workhorse.
Those with limited drawer space might consider hanging options—many color options include matching hanging loops!
We prefer keeping our blenders in dedicated storage containers that protect those sharp blades from damage. You know, it’s actually surprising how many people just toss their immersion blenders in crowded drawers where they can get knocked around.
Don’t forget to regularly check for worn or damaged attachments. I think they’re kinda like the shoes of your blender—they wear out first and need replacing occasionally while the motor base often stays strong for years.
Troubleshooting Common Issues
Even the most reliable immersion blenders can develop issues over time, but we’ve found that most problems have surprisingly simple solutions. If your blender isn’t performing well, check the blade alignment first—misaligned blades won’t blend efficiently and might cause unusual vibrations. You can often fix this by disassembling and reassembling the attachment properly.
Motor overheating is another common issue, usually caused by processing tough ingredients for too long. When this happens, unplug immediately and give it a rest for about 15 minutes.
We’ve learned that regular cleaning after each use prevents many problems—those food residues can really impact performance! And don’t forget to periodically check for loose connections or worn seals, which might be causing unexpected leaks.
Most issues are fixable with simple maintenance.
Frequently Asked Questions
Can You Use an Immersion Blender for Everything?
We’re in the same boat! No, we can’t use immersion blenders for everything. They’re great for many tasks, but consider cooking safety with hard ingredients and battery life for cordless models.
What Are Some Common Immersion Blender Mistakes?
We often make mistakes by immersing in hot liquids before starting, not keeping blades fully submerged, starting at high speed, overmixing batters, neglecting proper cleaning, and blending at angles—all common blending errors.
What Immersion Blender Do Chefs Use?
Ever wondered which blenders the masters wield? We’ve found chefs typically use high-powered Bamix, Vitamix, or Breville immersion blenders with professional techniques requiring 300+ watts, variable speeds, and ergonomic designs for brand comparisons.
What Are the Disadvantages of Immersion Blenders?
We’ve found immersion blenders have limited functionality with tough ingredients, struggle with fine textures, overheat easily, present costly maintenance due to hard-to-clean parts, and aren’t efficient for large quantities.